On Procrastination and Chocolate.

Teaser; no chocolate here, though I must say that I made a fabulous chocolate rye brownie recently that I highly recommend trying. You’ll find the link here.

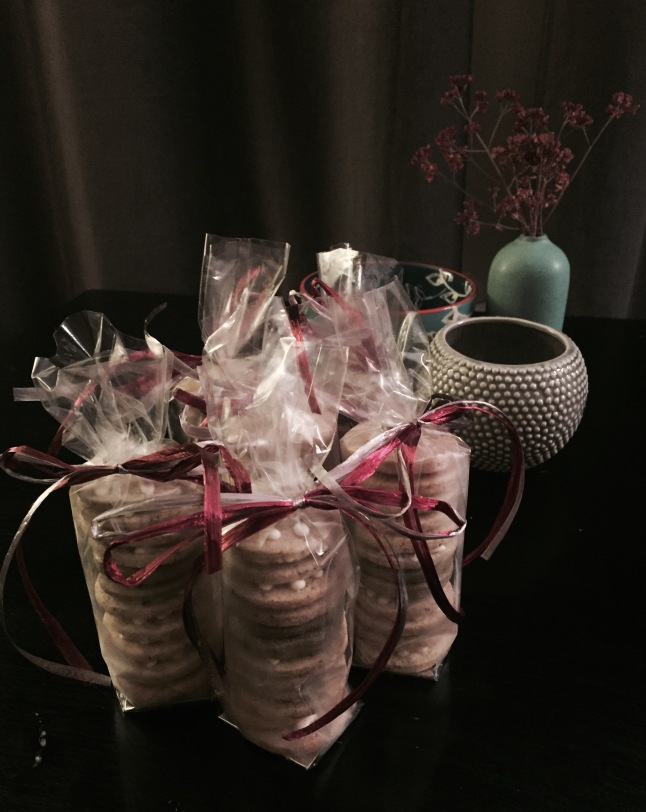
~I needed something self indulgent after a weekend of crafting gifts for others.

FullSizeRenderWriting recipes at times can be challenging. I like to buck the line at precision; and there are times when my “recipes” are just an approximation of this and that. Needless to say, this works much better in the realm of cooking, rather than baking, as there is a bit of science and technique one must follow.

IMG_9827That being said, sometimes it’s perfectly reasonable to “go offline” and trust instinct to guide us in the kitchen. Sometimes precision lies in the imprecision. As in life, occasionally we need to deviate from the path in front of us, the recipe, the method, and allow internal wisdom to navigate.

IMG_9828
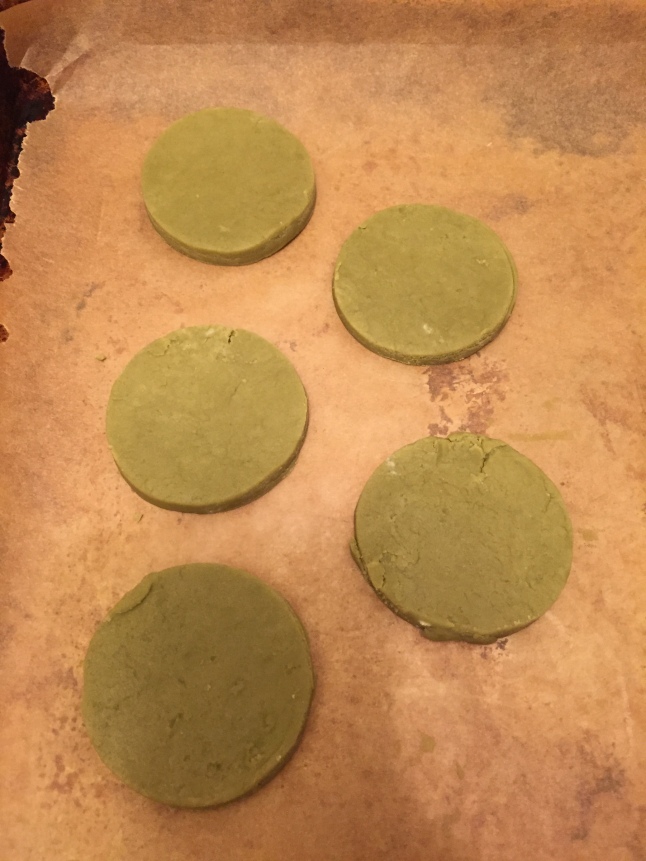
There are an abundance of holiday cookie ideas floating around at the moment, and I was struck by the simplicity of this Japanese tea flavored almond cookie. That’s often all it takes, an idea, an inspiration, and what follows is an outpouring of measures to translate it into something of my own (along with the mental inventory of what is in my pantry). This cookie had me thinking about shortbread. I’ve been making shortbread from a recipe I’ve refined over the years, a mash of several great ideas, that offers a perfect balance of sandiness, crisp and sweet, and I thought about adding a bit of matcha tea powder to flavor the dough.

As a ran through the park, other variations of tea-infused shortbread cookies came to mind, and by the time I’d arrived home, I’d committed myself to several hours in the kitchen. I was able to produce a batch each of earl grey, matcha and chai varieties before running out of flour…which led to the invention of a rye flour shortbread, flecked with pieces of candied and dried ginger.

IMG_9830In retrospect, I might boost the salt a bit, add an extra pinch. Increase the tea to 2.5 or even 3 teaspoons, and add a bit of freshly grated ginger to the rye version.

IMG_9776Use the recipes that follow as a template; an approximation of wet:dry, and tailor to suit your taste. Don’t be afraid to make a mistake. Errors are the building blocks to perfection.

IMG_9835These cookies go well with tea, obviously, or tucked into a lunchsack for an afternoon treat. There are fairly benign and can be justified is eaten any time of the day.

IMG_9837I’m trying a method-driven writing technique, rather than the standard approach, however the ingredients are all there. I hope you enjoy it.

Much Love,

J

Tea-Infused Shortbread

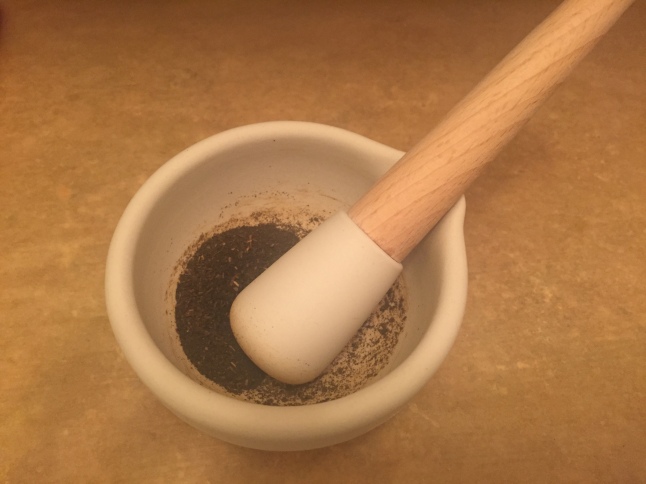
*This recipe includes rye flour, which pairs well with ginger. For a more truly authentic shortbread, use 1 cup unbleached flour, omitting the rye, and 2-2.5 teaspoons of ground tea of choice to sub in for the ginger.

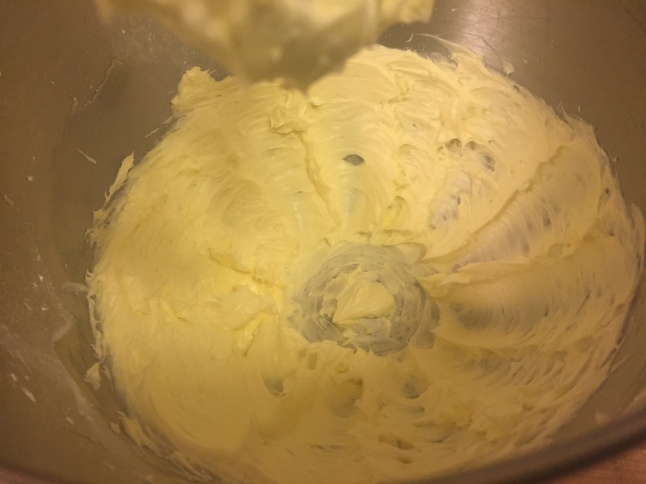
Beat 1/2 cup butter wth 1/3 cup powdered sugar until light and fluffy.

Add to that 1 tbsp fresh grated ginger and 3-ish tbsp chopped candied ginger.

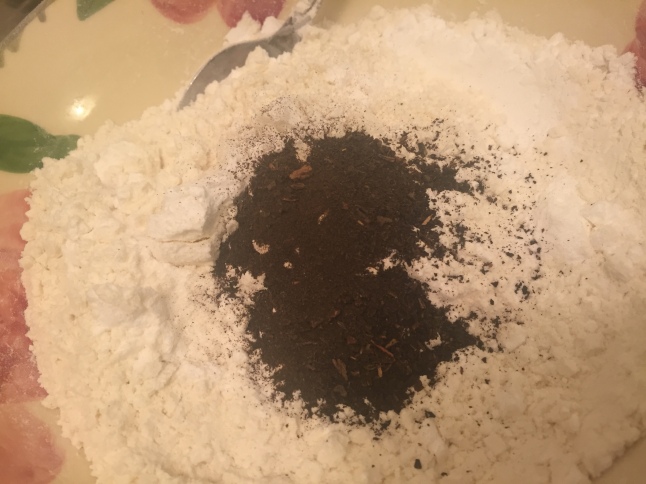
In a separate bowl, combine 2/3 cup unbleached flour with 1/3 cup rye flour, 2 tbsp tapioca flour (if you have it – makes them really light and sandy), 1/2 tsp salt and 1 tsp powdered ginger.

Mix it all together until just combined, then turn out onto some parchment and knead together, minimally.

Roll out 1/4-inch thick, then let dough rest in the fridge for about 30 minutes.

Preheat oven to 325F.

Using cookie cutters of choice, cut and set on parchment-lined baking sheet and bake for ~16 minutes, turning about halfway through. You want them to be just barely golden.

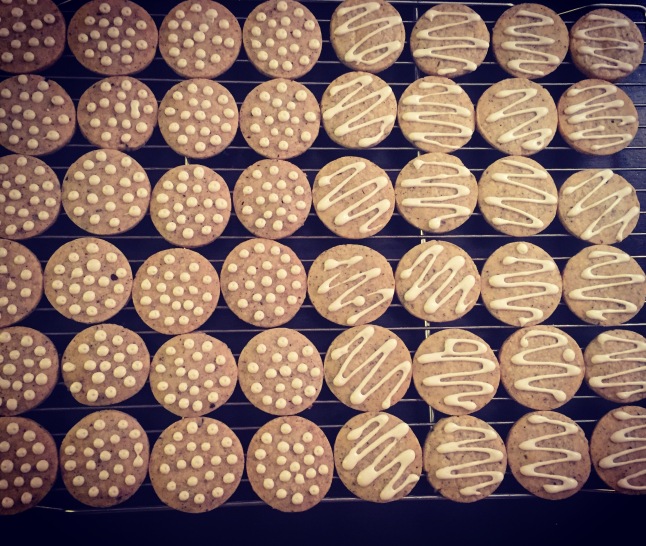
Allow to cool for a couple of minutes on baking sheet, then move to baking rack to cool completely.

Decorate, as desired 😘

This post is dedicated to D. Thank you inspiring me to cook, create, write, not to mention doing the dishes! I miss that.

Nibble.

I’m always tagging recipes to refer to later; all of my cookbooks have dog-eared edges (don’t judge). I have boxes here and there with printed or hand-written favorites, tabs throughout my Cook’s Illustrated magazines, foodie folders in my email accounts. My organizational skills are a bit sub-par, so finding a reference when I’m in creation mode presents somewhat of a challenge.

IMG_0835

The other day I had a bit of time on my hands and so I sat, sifting through some recipes and came across this one from CHOW featuring a honey ricotta tart (you can find the link, here.
I’d saved it over two years ago, as soon as I saw it, I knew I’d found my template.
I’ve been on a bit of a honey kick, as evident from recent posts, and had a craving for a pie or cheesecake at strategic points throughout the week.
Or daily.
Whatever.
IMG_0831
When I saw this pie, it brought to mind the cheesecake I’d made with chèvre. And over the next several hours, my mind wandered. I dreamt of salted pistachio with bitter orange, and floral honey with the tang of goat cheese.
Sadly my cheese benefactor was out of town this week, so rather than relying on her supply, I had to settle on store-bought chèvre.
Sadly, Beatrice could not contribute to my efforts

Beatrice.

I did manage to include the last bit of wildflower honey produced on the farm. I love using ingredients that are local and familiar; it makes the experience that much more personal.

IMG_0834
The flavors couldn’t have been more well-matched. The scent of orange, woven through the crust…it was hard to refrain from nibbling a pinch before I added the filling.
IMG_0833
A simple dollop of crème fraîche with a bit of reserved pistachios and a drizzle of honey elevate this tart to center-stage.
Enjoy, and much love,
J
Salted Pistachio, Orange and Honey Hart
Ingredients:
1 1/4 c flour
1/3 tsp fine sea salt
1/4 c powdered sugar
1 tsp finely grated orange zest
8 tbsp unsalted butter, diced and expertly chilled
1/2 c ice water*
*Note: you will only need ~3-4 Tbsp
Filling:
8 oz goat cheese
2 large eggs
1 tsp finely grated orange zest
1/3 c honey
2 Tbsp sugar
Topping:
2 tbsp salted pistachios, chopped
Pinch of coarse sea salt
Method:

1. Combine flour, salt, sugar and orange zest.
2. Using either a pasty blender or food processor, fold in diced butter and blend just until the mixture resembles coarse sand.
3. Add ice water, 1 tablespoon at a time, mixing with either hands or spatula until the dough just starts to come together. Mixture should be a bit craggy and on the drier side, but should come together if pinched.
4. Wrap dough in plastic or parchment and allow to rest for about an hour in the refrigerator.
5. Remove pastry and using a rolling pin, roll into a flat disc and press into a 9-in tart pan with removable bottom.
6. Prick bottom several times with a fork and set in freezer for about 10 minutes to firm up.
6. Preheat oven to 425°.
7. Line tart pan with a sheet of aluminum foil and fill with pie weights or dried beans.
Bake for about 15 minutes, remove weights and foil, lower heat to 350° and bake for 10 more minutes, just until golden-hued.
While tart shell is baking, prepare the filling:
1. Cream honey, sugar, cheese and orange zest together in a large mixing bowl, scraping down sides as needed.
3. Add eggs, one at a time, beating well.
4. Pour mixture into prepared crust and place on baking sheet in the oven. Bake for 20 minutes, then sprinkle top with a pinch of salt and the pistachios and bake for another ten minutes, or until the middle is just set.
5. Cool completely on wire rack.
Serve as is, or garnish with a dollop of crème fraîche, and a drizzle of honey.

Aplets and Cotlets.

Remember those classic confections? You know; the ones that stuck to your teeth and left you with no choice but to lick your fingers clean? They were a favorite of my father’s. Some of my fondest memories of childhood involve outings to the Pike Place Market, followed by a stroll along the waterfront and a visit in Ye Olde Curiosity Shop, ending the day with some fish and chips at Ivar’s. It was customary while at the market to pick up a box of aplets and cotlets, which rarely made the trek home unopened.

So that’s what I thought of when I envisioned this tart. I’d received a special request for apple pie, however I was thinking I could do a bit better and really wanted to “wow” with presentation. Tarts are fantastic that way, as the fruit is really the star, all caramelized and glistening to perfectly baked perfection. I’ve made many pies, and have gotten the basics of a good flaky pastry down. Always, always start with ice-cold ingredients, minimal handling, and appropriate rest. It’s like nurturing a new relationship: love the pastry. respect it. don’t interfere too much.

It’s quite simple really. I used a basic recipe for pate sablee ( you can find a link here), which I proceeded to roll out and tuck into a fluted ceramic tart pan, brushed generously with melted butter. It could easily be rolled out flat; placed directly on a cookie sheet, folding up the edges for a bit of rustic appeal. A tart pan with a removable bottom is also an option.

Pate Sablee

Pate Sablee

I then coated my apples with bits of butter and a mix of sugars for caramelization, along with lemon zest for fragrance and brightness. The perkiness of apricots complement the apples wonderfully; I found several examples that combined apples and apricots in turnovers, or using apricot jam as a glaze. Another consideration would consist of a simple glaze made with a reduction of honey, lemon and fresh ginger, though I would use a sweeter apple as the base.

Something to keep in mind: the crust may start to get a bit brown, and that’s okay. an interim solution is having strips of foil at the ready to fold around the edges. If you have a piecrust protector, then you’re a bit ahead of the game. Laying the dough flat and covering with apples end to end will also alleviate the concern for excessive browning, however, the perfectly browned, fluted borders really make a statement. In any case, this crust is cookie like, buttery, crisp and perfectly lovely in every way. Enjoy!

Sparkles, Alight.

Sparkles, Alight.
~happy birthday, David.

For the tart:

1 recipe pate sablee

4 tart apples (example: granny smith)

1/4 c each granulated sugar and brown sugar (muscovado is nice)

1 teaspoon freshly grated lemon zest

2 tbsp. butter, frozen and then grated or chopped into small bits the size of peas

For the glaze:

~1/2 c apricot jam

2 tbsp. apple juice, liquor, or water

Method:

Preheat oven to 400 degrees F.

Line a baking sheet with parchment, or if you are using a mold, brush bottom and sides generously with melted butter.

Measure the diameter of the tart pan you’re using. I used a pan that was ~8″x11″ at the base.

Roll out dough to 1/4-inch thickness and press into pan, allowing the dough to come up the sides. Pierce several times with a fork, then let rest in the refrigerator while preparing the filling.

Mix the sugars and lemon zest together with your fingers until fragrant; set aside.

Peel and core apples; slice into 1/4 inch lengths.

Fan apples onto the tart dough in rows, or if using a round pan, fan along the outer edges, working toward the center.

Sprinkle apples generously with sugar, then dot with butter.

the pre-bake.

the pre-bake.

Bake for 50-60 minutes, rotating halfway through.

Note: About mid-point in the baking, warm jam and liquid over medium heat until lightly bubbling. Strain into a bowl or measuring cup (I use a sieve to remove the fleshy bits of fruit). Set aside.

Remove from oven and brush with apricot glaze.

Serve warm or at room temperature with freshly whipped cream or crème fraiche.

Much Love,

J

When life gives you cheese…

What does one say when offered a couple of pounds of fresh chèvre? An exuberant “Yes!” of course. David’s mother had a bit of chèvre left over from an event and thought I might be able to make good use of it. I had no idea what to do with such generous bounty, however I found myself envisioning something baked, and sweet. It was not long before I started scouring my books and the Internet for cheesecake recipes, however I never found exactly the right one.

See, I rarely follow recipes verbatim, rather, I use them as a template and let my intuition and the ingredients take their own form. I have a bit of experience making quiche; the marriage of eggs and dairy yielding a savory, creamy custard. Cheesecake has similar components, so it was just a matter of getting the right proportions so the whole thing didn’t end up a liquid mess. Or worse. I have had my fair share of quiche coming out of the oven, gently caramelized with the appearance of perfection, only to find it runny in the center.

I avoided adding lemon, as I thought tanginess from the goat cheese would lend the perfect balance to the sweet, richness of the cake. I also wanted to keep it as un-fussy as possible, using minimal ingredients. So many recipes called for additions of sour cream, crème fraiche, mascarpone…in the end I went for a good old-fashioned ratio of two parts goat cheese to one part cream cheese. I also learned something along the way. It is a bother to separate eggs, beating and aerating the whites into gentle wet clouds, only to have them flatten completely while trying to incorporate them into such a rich base. I’ll save you the trouble with this recipe.

Image

In order to make this bad boy, I strongly recommend reading the recipe through, so as to be prepared for the steps involved. While they may seem a bit laborious at first glance, it’s totally worth taking the time to do this right. This recipe uses a bain-marie, or water-bath technique, which moderates the heat and promotes even baking and consistency. When using a spring form pan, it may be necessary to wrap a layer of foil around the bottom and sides of pan to prevent any water from making it’s way into the lovely cake.

And lastly, unless you plan to serve this cake at 2am, it’s best made a day before serving, as it takes several hours to set and chill.

Must haves:

9-inch spring form pan

roasting dish or other large dish that will accommodate the pan

For the crust:

3 oz graham cracker squares

3 oz ginger snaps

4 tbsp unsalted butter, melted

Filling:

16 oz chèvre

8 oz cream cheese

3/4 c unbleached cane sugar

Seeds of 1/2 vanilla bean, or 1 teaspoon vanilla (though I prefer the former)

4 eggs

Method:

  1. Preheat oven to 325 degrees Fahrenheit
  2. Blitz graham crackers and ginger snaps in a food processor, or if you prefer a messier route, crush in a plastic bag with a rolling pin. You’ll want about 1 ½ cups of crumbs. Put into a medium-sized bowl.
  3. Combine the crumbs with melted butter and press into pan, allowing a bit to inch up the sides.

    Ginger-graham crumble

    Ginger-graham crumble

  4. In a large bowl, cream together the cheeses, sugar and vanilla seeds/vanilla; beat until light.
  5. Add eggs, one at a time, incorporating fully.
  6. Pour into springform pan. If there are any gaps in the seal, wrap the pan with a layer of tinfoil.
  7. Set pan into roasting tray; fill tray with water to within an inch of the rim.
  8. Gently place the tray in the oven and bake for ~1 ½ hours.
  9. Give the cheesecake a gentle shake; it should be somewhat yielding, but not loose. If it is, add another ten minutes to the baking time.
  10. Remove from oven and allow to cool for least an hour, then chill in the refrigerator several hours further.
  11. Serve as-is, or garnish with pomegranate seeds, fresh berries, quince paste…the possibilities are endless!

Much Love,

J

Cheesecake with chèvre

Cheesecake with chèvre

Feed your soul…

It’s good to get a girl out of the city. Just a couple of days, immersed in the awesome wonder and beauty of nature.

Necessary rejuvenation.
White Horse Mountain

White Horse Mountain

White Horse Mountain

Stillaguamish River

And so we drove to Darrington to spend the weekend at the family farm. Nestled on a hill overlooking a small pond, far away from city lights, acres of lush land, trees, nothing to hear but the sound of dragonflies snapping themselves against the glass-paneled walls, denied access to the indoors. Being greeted by the sweet smell of cedar as I enter the cabin. It’s enough to just take a deep breath and…exhale gratitude. It was exactly what I needed; a place of respite, a place to disconnect, to ground, and to eat!
Ooh! and kiss the goats.
Kissing the babies

Kissing the babies


Africa
I had a few ideas of what I wanted to make prior to our departure. First, I am obsessed with the new collaboration by Yotam Ottalenghi and Sami Tamimi; Jerusalem. I was gifted this cookbook, full of gorgeous color photos and mouth-watering delights. I aspire to cook every recipe in this book. This weekend I elected to make the Lamb Stew with Cannellini Beans. The broth had an unctuous, mildly sweet profile, and with 20 cloves of garlic (twenty!), surprisingly didn’t leave us smelling like stinking roses for the remainder of our stay. I accented the stew with some crushed cilantro, mixed with lemon, sugar, salt, chile, ground coriander and olive oil. It’s kind of like loose adaptation of Zhoug, a gremolata-style condiment. I must say it was perfect; it brought a citrusy brightness complementing the heft of the soup perfectly.
Lamb stew with cannellini beans

Lamb stew with cannellini beans

I’d been dying to make something sweet and cakey ever since last week’s incredible uber-blueberry cornmeal muffins (of which I’ll try to write a recipe as soon as I recall my method!). David’s mother sent me a clipping from the NY times which served as inspiration:  almond cake with figs; dense, honey-sweetened and rich with eggs and butter. I had a couple of perfectly-ripened peaches on hand, and so the recipe underwent a bit of metamorphosis. this peach-blueberry almond cake is something between a cake and a tart, perfect with afternoon tea, or eaten cold with some Greek yogurt for breakfast. We served it after dinner with a bit of freshly-whipped cream.
With fresh whip!

With fresh whip!

Peach-Blueberry Almond Cake

Peach-Blueberry Almond Cake

Peach-Blueberry Almond Cake
*Adapted from NY Times Fig and Almond Cake
Ingredients:
1 c almond flour
1/2 c unbleached pastry flour (or all purpose flour)
1/4 c fine sugar
1 tsp baking powder
1/4 tsp cinnamon
1/2 teaspoon salt
3 eggs
4 Tbsp butter, melted
2 Tbsp honey
1 tsp lemon zest
1/2 tsp almond extract
1 med-large ripe peach, sliced into 1/4-inch crescents
1/2 c blueberries
Method:
  1. Preheat oven to 375
  2. Butter a 9-inch tart tin with removable bottom (line bottom with parchment, if you prefer).
  3. Combine all dry ingredients in medium-sized mixing bowl.
  4. To a separate bowl, whisk the eggs, honey, lemon zest and extract, then whisk in melted butter.
  5. Create a well in the center of the dry ingredients and fold in the wet mixture, stirring until just combined.
  6. Spread batter into tart pan. Fan peaches on top, leaving small amount of space between the slices. Toss the blueberries casually over the top, allowing them to roll into the crevasses.
  7. Sprinkle either a bit of Demerera sugar, or other granular sugar over the top (~3 teaspoons)
  8. Bake for ~30 minutes, until golden and firm to the touch.

Upon our return home, we made yet another of Yotam’s recipes for Cauliflower cake. You can find the recipe online. A savory cake, reminiscent of something between a quiche and a custard, this dish packs tons of flavor and is an excellent source of protein. I served it with a salad and a simple vinaigrette. So good!

Cauliflower Cake

Cauliflower Cake

With love (and full belly).

~J

…or how to make a pie

As mentioned previously, I like to do a bit of foraging in the city. While I consider myself an amateur, I think today I may have happened upon some purslane. Of course, I took a nibble, and then proceeded to take a handful to nosh on the way home. This is probably not the wisest of choices, however I’m fairly certain my ID was accurate. Take note however, as this may prove to be my second and last post!

IMG_7115

Moving on…

One of my most favorite things to make is pie crust. Something marvelous happens with the simplest of beginnings. Those tiny bits of butter, strewn throughout the flour which, when heated, burst into little pockets of air that buoy the dough, rendering it tender, flaky, crisp and golden. Pure heaven.

Pie crust involves a small amount of effort, however it does not require any special equipment. One can use  a food processor, a pastry cutter, or simply a fork. I find the latter extremely gratifying, especially if you like the tactile experience of working with pastry dough. I admit that most often I use a food processor, if only for expediency.

The key with pastry dough is to work the flour as little as possible; you do not want to activate the gluten. Gluten is a protein that is found in wheat and becomes elastic when worked. Fantastic for bread, terrible for pie.

Note:

  • chilling butter in the freezer will keep intact when incorporating into the flour
  • This recipe yields one pie crust. For a top crust, make two batches
  • For sweet pies, add 1 T sugar to the dough

You will need the following:

1 cup + 2 T pastry flour (OK to substitute standard unbleached flour)

1 tsp salt

1 cup (8 T) very cold unsalted butter; roughly cut into ~1/2-inch chunks*

3 T ice water (plus more, if needed)

Method (Makes One Crust)

  1. Pulse flour and salt in food processor, or sift together in large bowl
  2.  butter to flour/salt mixture and pulse for ~20-30 seconds, or cut in with pastry tool/fork. The flour should take on a sandy texture; you want small beads of butter evident throughout; no larger than a bb.
  3. Add ice water, and pulse a few times, or work in with pastry tool. This is where being conservative is key; you want to work the dough only until it comes together when pinched. It should look a bit on the dry side, but have some cohesion. Add more water, 1 tablespoon at a time, to achieve this. Pulse about five more times and pinch it with your finger. Does t stick?
  4. Turn onto a piece of plastic wrap or parchment; knead a few times, then press gently and quickly into a disk; this makes it easier to roll.
  5. Now – leave it alone! Place in the refrigerator and chill for at least 30 minutes
  6. Turn oven to 425* and lay out piece of parchment dusted with flour. Top with another piece of parchment and roll until it resembles a disk slightly larger than the diameter of the pie dish; ~1/4 inch thick

IMG_6088

  1. Loosely fold in half and drape over an 8-inch deep or 9 inch buttered pie pan
  2. Press gently into base and crimp the edges toward the dish to for a ring. You can get fancy if you like; I prefer a more rustic appearance.
  3. Prick a few times with fork and set back in the freezer for ~10 minutes
  4. Proceed with recipe, or follow blind baking technique below:

Blind Baking:

This is a key step in making any kind of pie that holds fruit that yield liquids (peaches, berries rhubarb), or for savory pies such as quiche. So termed Blind Baking, this technique of par-cooking the pastry ensures crust and bottom that is fully cooked, not soggy. Well worth the extra few minutes of effort.

There are pie weights available for purchase, however I find dried beans a more ready and reasonably inexpensive alternative; look for a larger, heavier bean, such as garbanzo or kidney beans; they may be saved for repeat use; store in a glass jar once cool.

Method:

  1. Preheat oven to 425 degrees
  2. While pie is chilling in the freezer, pull a piece of tinfoil slightly larger than the widest diameter of  the pie plate. Butter one side.
  3. Lay buttered side down in pie dish; press lightly into dough.
  4. Fill the foil/dish with pie weights or dried beans completely.
  5. Bake in preheated oven for ~12-15 minutes, just until crust has a faint golden hue
  6. Remove from oven. Pull foil/pie weights (gently!) from crust. Proceed with recipe.

Stay tuned for…Berry Tartlets

IMG_6090